Self-Host a Documentation Site with Docker Compose
A verified install-to-first-publish workflow for Nibleaf with Docker Compose, including release integrity, backups, restores, upgrades, rollback, security, and monitoring.
· · 13 min read · By The Nibleaf team
Self-hosting a documentation platform is a state-and-recovery problem more than a Docker problem. A successful docker compose up is only the start: you still need a manual publish, a public-reader check, and a restore rehearsal.
This workflow was verified on 31 August 2026 against release/self-host.json, scripts/install.sh, docker-compose.prod.yml, and the product's sign-up and publishing code. The published release at that boundary is v0.1.2. Source main may contain features that are not in that image.
Know what the release installs
The guided installer writes two files into the chosen installation directory: .env and docker-compose.yml. It pulls the pinned image and starts the stack. It does not clone the repository or install scripts/backup.sh.
The release manifest currently records:
version: v0.1.2
installer sha256: d23da907556cc31ddd4d7b3a7f62ed933106bcef8b2e9439c15e7ab71a05e59a
compose sha256: 1097cc899705fed843acd71eff11eed8ffa8c54d7edea4bba948ab4e84d4cce9
Those hashes are evidence for the published files, not a substitute for reviewing the script. Download, verify, inspect, then run it:
curl -fsSLo nibleaf-install.sh https://nibleaf.com/install.sh
printf '%s  %s\n' \
  'd23da907556cc31ddd4d7b3a7f62ed933106bcef8b2e9439c15e7ab71a05e59a' \
  'nibleaf-install.sh' | sha256sum --check -
less nibleaf-install.sh
sh nibleaf-install.sh
Recheck release/self-host.json before using that command later; a new release should change the version and checksums.
Map the services and durable state
The production Compose file separates these jobs:
| Service | Responsibility | Restore from backup? |
|---|---|---|
app | Dashboard and published reader | No |
server | Authentication, content, publishing, and domains | No |
worker | Publish jobs and search indexing | No |
migrate | One-shot database migrations | No |
postgres | Accounts, projects, pages, snapshots, and events | Yes |
dragonfly | Queue and disposable cache state | No |
maxio | Bundled S3-compatible uploaded assets | Yes |
If you configure external S3 or R2 instead of maxio, that remote bucket remains durable state and needs its own versioning, backup, and restore plan. The repository helper cannot copy an external provider for you.
Only the reverse-proxied web entry point should be public. Keep PostgreSQL, Dragonfly, Maxio, the internal API, the migration job, and the worker on the Compose network. Follow Docker's production guidance for controlled changes and overrides.
Install to the first manual publish
After the installer finishes, change into the directory it reports. The generated file is named docker-compose.yml, so normal Compose commands find it without a -f flag.
cd nibleaf
docker compose ps
docker compose logs migrate
docker compose logs --tail=100 server worker app
Do not continue if migrate failed or the long-running services are restarting. Then complete the application proof:
- Open
$APP_URL/sign-upthrough the final TLS hostname and create the first owner. - Nibleaf provisions a starter project and performs a system-initiated starter publish. Treat that as provisioning evidence only.
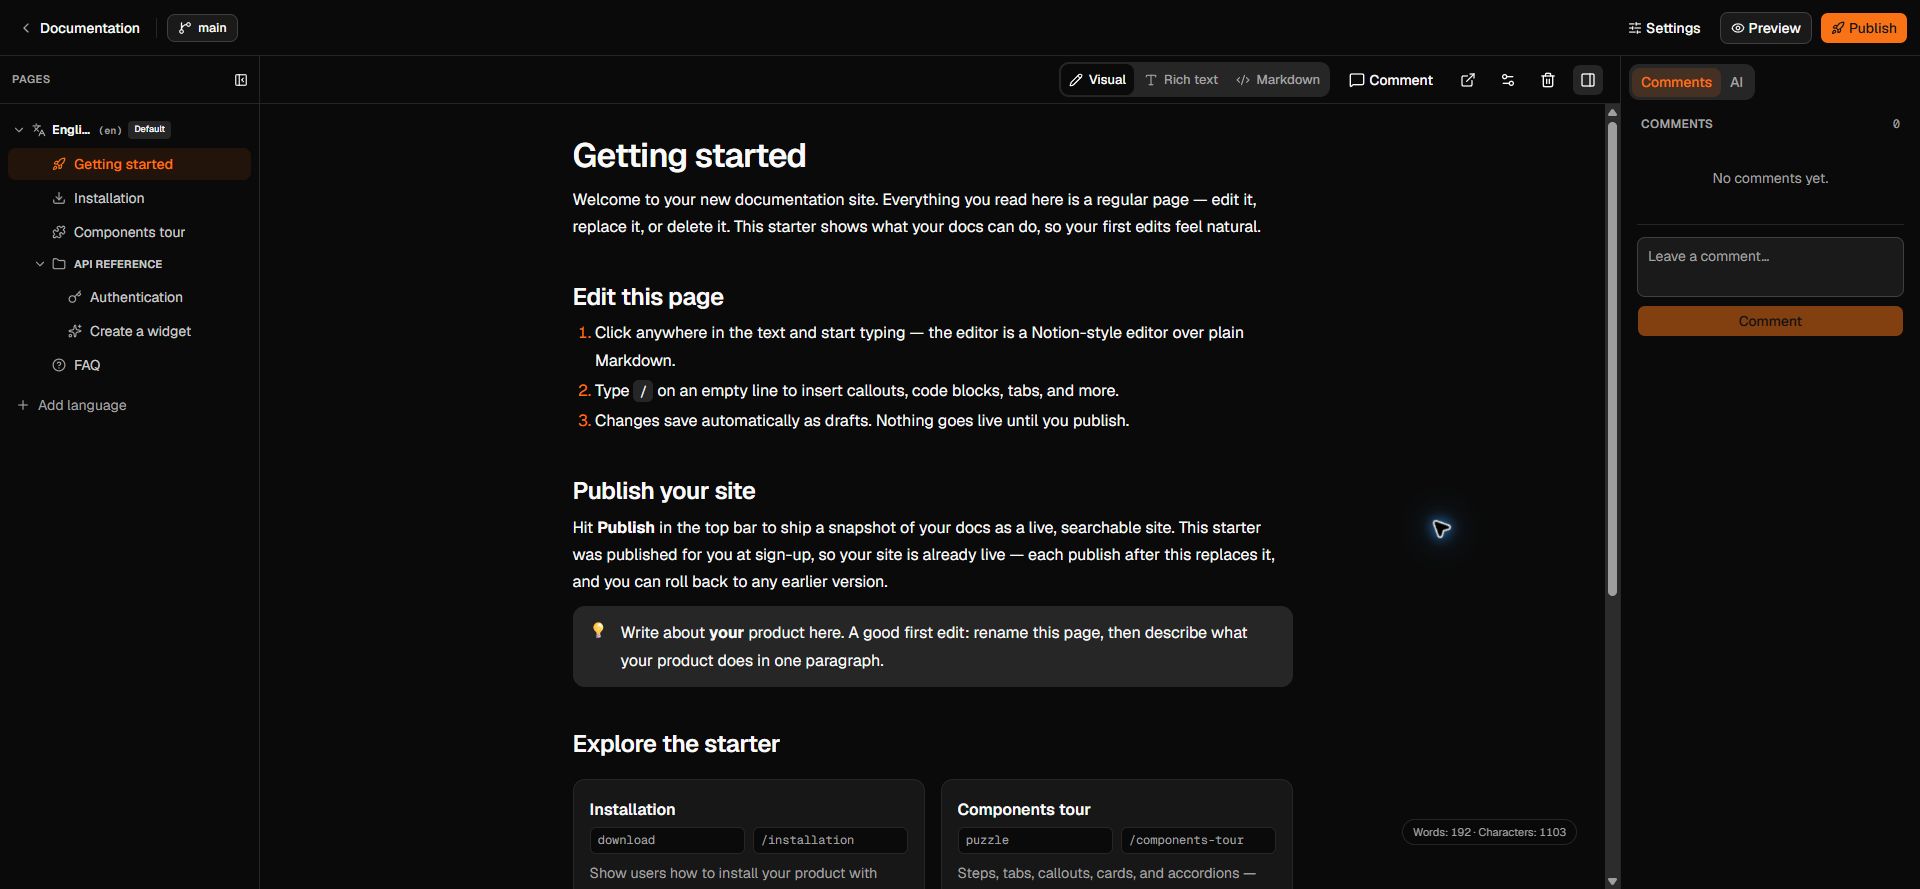
- Open the starter project and its editor. Change a visible sentence and wait for the saved state.
- Open Preview and confirm the draft contains the change while the public READY site still shows the previous snapshot.
- Click Publish yourself and wait until the deployment is READY.
- In a signed-out browser, open the published page and confirm the change, an uploaded image, and search.
- Request a missing page and confirm a real HTTP 404. If the site has Arabic, confirm initial HTML contains
lang="ar"anddir="rtl".
Configure origins, secrets, mail, and storage
The dashboard URL, authentication origin, site-domain base, storage public URL, and reverse-proxy hostname must agree. Origin drift can break secure cookies, redirects, canonical URLs, uploaded images, and project links while every container still looks healthy.
Generate independent authentication, database, analytics-hash, and storage secrets. Do not keep the example defaults. Store a recovery copy outside the host and outside broadly shared content backups. Configure email before requiring verified sign-in, and disable open signup after the intended owners exist if the installation is private.
For an external S3-compatible service, verify the endpoint, region, access mode, bucket, CORS rules, and public asset hostname together. Upload and read one image through the exact hostname readers will use.
Back up, restore, and state the boundary truthfully
A complete backup includes PostgreSQL and the asset store. Queue/cache state is disposable. The guided installer does not deliver the repository helper, so either:
- obtain
scripts/backup.shfrom a checkout or archive that matches the installed release and review it; or - implement equivalent
pg_dumpand bucket-copy commands in your own operations repository.
The helper covers PostgreSQL and the bundled Maxio volume. It does not capture an external S3/R2 bucket, TLS material, DNS, provider settings, or secrets stored outside Compose. Protect those separately.
Restore into a clean, isolated installation: load the database, restore assets, supply the original secrets, start the pinned version, and open several published pages including images. Then run search and a manual publish. A created archive is not restore evidence.
Record the observed recovery point and recovery time. Do not claim zero downtime from a single-host Compose deployment; continuous external probes and overlapping provider-side capacity would be needed to establish that separately.
Upgrade and rollback without wishful thinking
Use a versioned image or digest. Before an upgrade:
- Read release notes and environment changes.
- Create and verify database and asset backups.
- Pull the exact target image.
- Run the one-shot migration and inspect its logs.
- Start the stateless services and check internal health plus the public hostname.
- Repeat the manual-publish, search, image, canonical, sitemap, and 404 checks.
Database migrations may be forward-only. “Rollback” may require restoring the pre-upgrade database and asset backups before starting the old image. Republishing an earlier content snapshot only rolls back reader content; it does not reverse schema, secrets, DNS, or infrastructure changes.
Reconcile in-flight work and the support boundary
Before an upgrade or restore, inspect publish, indexing, email, webhook, and export jobs. Record whether each job is safe to resume, must be replayed with an idempotency key, or should be discarded. After recovery, validate one complete job of every critical type; a restored database and bucket do not prove the worker state was reconciled.
Read the support policy and EOL status for the exact release. The public code is AGPL-3.0; how its network-use terms apply to your modifications, and whether you may use project names, logos, or domains, are legal and trademark questions outside this runbook. Obtain qualified counsel for material decisions. This guide is not legal advice and grants no trademark rights.
Monitor the user path and size from measurements
The project's 2 GB recommendation is a starting point for pulling a prebuilt image, not a production benchmark. Observe idle memory, peak memory during publish and indexing, database and bucket growth, disk after a backup cycle, queue depth, migration status, and latency from an external probe. Leave upgrade headroom.
Size from observations, not a guess
Use the resource-sizing observation worksheet as a column template. Its three rows and values are illustrative, not Nibleaf requirements or benchmark results. Replace them with at least seven representative days that include ordinary reads, a publish, search indexing, backup activity, and one recovery rehearsal.
For each service, compare steady-state and peak resident memory, CPU saturation, queue depth, database connections, publish duration, and external p95 latency. Set a limit only after observing the peak and leaving explicit headroom for a cold cache, retry burst, overlapping replacement, and restore. Record the host, revision, content size, traffic shape, and measurement tool so another operator can reproduce the decision.
If the evidence window is missing, the production capacity remains unknown. Do not convert the 2 GB install starting point into an SLA or universal minimum.
Monitor at least the dashboard, server health, worker failures, PostgreSQL, object-store reads/writes, certificate expiry, disk, and a public published page. Container health alone cannot prove DNS, TLS, canonical output, wildcard subdomains, or the reader path.
Compose is a reasonable fit for a small team that accepts one understandable host and owns the operational work. If the team needs managed operations, use Nibleaf Cloud. If it only needs developer-maintained Markdown, compare a static generator such as Docusaurus before operating a full platform.
Frequently asked questions
- How much RAM do I need to self-host a documentation site?
- The project’s starting recommendation is 2 GB when pulling a prebuilt image. Measure the complete stack under your own content and traffic before choosing production capacity.
- How do I back up a self-hosted documentation site?
- Back up PostgreSQL and the asset bucket. The guided installer does not install the repository backup helper, so obtain scripts/backup.sh from the matching release checkout or implement equivalent tested commands.
- Do I have to run database migrations manually when upgrading?
- The production Compose stack includes a one-shot migrate service. Confirm its successful completion before treating the application services as healthy.
- Can I use my own domain with a self-hosted docs site?
- Yes. Configure DNS and TLS at the reverse proxy, then set the application and site-domain environment values consistently.